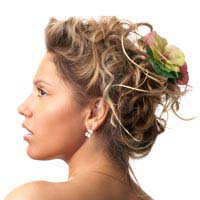
Make Your Own Hair Accessories

Making your own hair accessories allows you to make unique items to go with your own outfits. You could save money by making your own hair accessories too, as well as it being an enjoyable pastime. Handmade hair accessories make thoughtful and unusual presents and once your standard gets high enough you may even be able to sell them.
Painted Hair Grips
The most easy thing to do is to decorate your own kirby grips. Kirby grips or bobby pins can be bought for just a few pounds. Paint them with glittery or metallic nail varnish or glue on sequins. You can also try tiny rhinestones or beads.Make a Flower Headband
To make your flower, choose some pretty fabric with some weight so it is not too floppy. Cut out circle or flower shapes, making the shape smaller each time. Start at around 4 inches and work down to around 1.5 inches but you can experiment.Hand stitch the ‘petals’ together through the centre using co-ordinated thread. You can add some beads or sequins in the centre for decoration. Take a piece of flower wire (used in flower arranging) around 6 inches long and hand stitch it to the back of the flower centre securely.
Next take a co-ordinated headband (preferably fabric covered) and wrap the wire around the band a few times (in a place where the fabric flower will cover the wire). Get the wire between the headband teeth for security. Make sure the end of the wires are curved round to prevent digging into your head. Finish the headband by glueing the edges of the flower down for neatness.
You could also use the flower to glue or sew onto a hair pin.
Make a Vintage-Style Feather Hair Clip
Choose some feathers than match your outfit – feathers are available in most good craft shops, with a wide range of bright colours and designs to choose from. Get a co-ordinating piece of felt and cut it into a rectangle slightly bigger than your hair clip. A classic hair clip which snaps shut will be fine.Glue the felt to the top of your hair clip using a hot glue gun. Take care to leave some of the clip free so that it can still snap open and closed. Take your feathers and trim off the end of the stems. You can glue one or two feathers onto the fabric, or glue quite a few in a fan shape or a full circle/flower formation. You can also use co-ordinating jewels or sequins to cover up any joins.
Make a Bow Hair Clip
Bow hair clips are quick and easy to make and make a cute style statement. You can make as many as you like using inexpensive ribbon of different designs. For each bow, you’ll need about 75cm of ribbon. Cut the ends off at an angle. If you want to you can stitch or glue the edges over to avoid fraying.Tie the ribbon in a bow, making sure the ‘knot’ isn’t too tight and there is an attractive amount of ‘tail’ hanging down. Stitch the centre of the bow to hold it. You can cover the stitching with a button, sequins, a jewel or another piece of ribbon. Glue the bow onto a hair clip.
- Using Honey to Make Your Own Beauty Treatments
- Tackle Tired Eyes: Make Your Own Cooling Eye Wash
- How to Make a Natural Insomnia Remedy
- How to Make Your Own Natural Health Booster
- How to Make a Natural Hangover Cure
- Homemade Sunburn Soother Recipe
- Make Your Own Dry Shampoo
- Make Your Own Soothing Cough Mixture
- Make Your Own Anti-Ageing Cream
- Make Your Own Natural Exfoliator
- Make Your Own Cosmetics
- Make Your Own Toothpaste & Mouthwash
- Make Your Own Deodorant
- Make Your Own Soaps
- Make Your Own Natural Foot Scrub & Lotion
- Make Your Own Natural Hair Products
- Make Your Own Natural Facemask


Re: Make Your Own Cat Litter
Why on earth is cat litter under Food Projects?? Also why is a British site giving recipes in cups?? I'm so confused.
Re: Make Your Own Cosmetics
I’m interested in starting my own makeup like but unsure how to go about it please can you help
Re: Make Your Own Cosmetics
I’m interested in having my own makeup line and I’m not sure how to start and go about it. Can you please assist me? Thank you
Re: Make Your Own Cosmetics
Hi I just wanted to get some infomation on how to start my own beauty brand and how much would it cost to make my own beauty line thank you
Re: Make Your Own Sloe Gin
I'm a newbie with sloe gin....made some fortnight ago and upon shaking just now I seem to have white bits floating around...is this…
Re: Make Your Own Tea
Hi I’m wanting to blend my own tea pack and label it in small amounts Can you do this
Re: Make Your Own Washing Powder & Fabric Conditioner
I have been making my own washing powder for about four years now and I use DriPak products, but…
Re: Make Your Own Washing Powder & Fabric Conditioner
Estelle - Your Question:What are the ingredients for making Washing powderOur Response:The detai
Re: Make Your Own Washing Powder & Fabric Conditioner
What are the ingredients for making Washing powder
Re: How to Make a Green Roof for Your Shed
I want to cover a large log cabin using a sedum blanket. Is it possible to buy the basic blanket for planting up…