Make Your Own Furniture Polish

Wood is one of the most desirable materials for making furniture, and for good reason. With a multitude of colours, grains and uses, it can be used to achieve different looks to suit almost any taste. Whether you’re a fan of natural, rustic oak pieces, or prefer French-polished dark exotic woods, one thing for sure is that you’ll want to keep your wood furniture looking great and in good condition so it lasts for years to come.
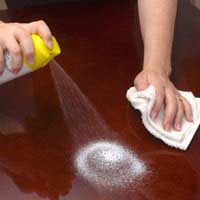
One way of doing this is to routinely apply furniture polish. This can be done with either ‘finished’ or ‘unfinished’ wood. There are many commercial furniture polishes available, but you can easily make your own. Some branded furniture polishes can leave an overpowering smell, and despite claiming to include ‘natural’ ingredients such as orange oil furniture polish, they are still essentially your standard furniture polish wrapped up and marketed to be more appealing. Making your own homemade furniture polishes is, therefore, still a desirable alternative.
However, there are times when commercial polishes may be your best option. French furniture polish is made using shellac and alcohol, and creates a very high gloss finish. French furniture polish can come as part of a French polishing kit, and requires some more specialist treatment and handling compared to other polishing methods. Therefore in this case, it is perhaps best to go with the shop-bought products, as producing your own French polish could be laborious, difficult and even dangerous if not done correctly!
This article looks at a few different ways to make your own furniture polishes for finished and unfinished woods.
The Simplest Way For Finished Wood
The simplest way to make your own furniture polish is to use olive oil and lemon juice. Simply mix 2 parts of olive oil or mineral oil to 1 part of lemon juice, and rub onto your wood using a lint-free cloth. The lemon juice cuts through grease and grime, and the olive oil ‘conditions’ and polishes the wood. Once you have thoroughly applied the mixture, you can then buff with a dry, soft, lint-free cloth. This is ideal for finished woods, but shouldn’t be used on laminates. It also needs to be used on the same day, as it is not suitable for storing.Beeswax Furniture Polish
Another simple recipe is to make your own beeswax furniture polish. All you need is to substitute olive oil in the above recipe for beeswax – so 2 parts of beeswax to 1 part of lemon juice. Alternatively, you could use the following recipe to create a creamy beeswax furniture polish:55g (2oz) beeswax
280ml (1/2 pint) turpentine
7g (1/4oz) fragrance or essential oil of your choice
You’ll basically need to very gently heat the turpentine and wax in a metal saucepan, taking care not to allow it to simmer or boil. Mix the ingredients together as the wax dissolves. Bear in mind that turpentine is a flammable material, and so the necessary precautions should be made beforehand. If you like the smells of polishes like orange oil furniture polish, then at this stage you can add in a drop of fragrance oil once the mixture starts to cool. You can then transfer the mixture into a jar or container with a lid. Leave to cool.
This cream polish can then be applied to the wood with a lint-free cloth, before being buffed. The initial smell of turpentine will diminish quickly after application.
These recipes are easily made at home, but you should always make sure to take sensible precautions when heating and transferring hot liquids. Always take care to remove animals or children from your work area.
- Make Your Own Electricity
- Ten 'Make Your Own' Uses for Lemons
- Make Your Own Humane Mouse Repellent
- Make Your Own Brass and Copper Cleaner
- How to Make A Garden Wildlife Pond
- Make Your Own Fruit Cage
- Make Your Own Bird Feeders
- Make Your Own Water Butt
- Make Your Own Wildlife Habitats
- Make Your Own Natural Home Cleaning Products
- Make Your Own Plastic Bottle Greenhouse
- Make Your Own Solar Panel
- Make Your Own Birdhouse


Re: Make Your Own Cat Litter
Why on earth is cat litter under Food Projects?? Also why is a British site giving recipes in cups?? I'm so confused.
Re: Make Your Own Cosmetics
I’m interested in starting my own makeup like but unsure how to go about it please can you help
Re: Make Your Own Cosmetics
I’m interested in having my own makeup line and I’m not sure how to start and go about it. Can you please assist me? Thank you
Re: Make Your Own Cosmetics
Hi I just wanted to get some infomation on how to start my own beauty brand and how much would it cost to make my own beauty line thank you
Re: Make Your Own Sloe Gin
I'm a newbie with sloe gin....made some fortnight ago and upon shaking just now I seem to have white bits floating around...is this…
Re: Make Your Own Tea
Hi I’m wanting to blend my own tea pack and label it in small amounts Can you do this
Re: Make Your Own Washing Powder & Fabric Conditioner
I have been making my own washing powder for about four years now and I use DriPak products, but…
Re: Make Your Own Washing Powder & Fabric Conditioner
Estelle - Your Question:What are the ingredients for making Washing powderOur Response:The detai
Re: Make Your Own Washing Powder & Fabric Conditioner
What are the ingredients for making Washing powder
Re: How to Make a Green Roof for Your Shed
I want to cover a large log cabin using a sedum blanket. Is it possible to buy the basic blanket for planting up…