How to Make Your Own Fossils

For children, natural history can be full of wonder. Trying to bring to life a world that existed millions of years ago, home to dinosaurs and all manner of strange creatures, can excite the imagination, whilst proving to be a fantastic and relevant learning experience. What better way to indulge a child’s interest than by engaging them in a craft activity?
Finding an Object to Fossilise
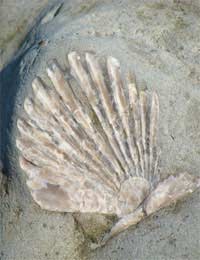
Natural history museums are the best place to find and explore real prehistoric fossils and dinosaur bones. However, did you know that you can make your own fossil imprints in your own home? Your back garden or local park can be home to a whole host of potential fossil imprint materials. Even just finding something to ‘fossilise’ can be a fun activity in itself.Ideally you’ll need something that has lots of ‘relief’ edges. Leaves, coins, toys and shells are great ideas to get you started - the more textured the object, the better.
Making Your Mould
To make a fossil you basically need to create an imprint, or cast fossil. Many fossils are actually imprints of a creature or object that has since decayed, and this is what you’ll be creating first.The mould that the imprint will be made in can be made from commercial play dough. However, if you don’t have this to hand, you can easily make your own:
- 1 cup Flour
- 1 cup plain water
- ½ cup table salt
- 2 tablespoons cream of tartar
- 2 tablespoons vegetable oil
- Food colouring (optional)
To make the dough, mix all the dry ingredients together in a saucepan. Make a small well in the middle of the mixture and pour in a small amount of water, enough to produce a smooth, creamy consistency. You can also add in the food colouring at this point, if desired.
Then add in the vegetable oil, thoroughly and evenly mixing. At this point the mixture can then be placed on a gentle heat. Constantly stir the mixture as it heats, until the mixture starts to turn into a ball. Once it has balled, remove it from the heat and leave to cool for around 30 minutes. After this time, knead for a few minutes and you’re ready to go!Then, to make your cast fossil, simply imprint the object into a small plaque of dough and leave to air dry for a few days.
Plaster Fossil Mould
Making your own plaster fossil mould is a slightly more messy affair. To do this, you’ll need the object you wish to fossilise, a shallow disposable bowl (such as an ice cream tub cut down to remove the depth), mixing spoon, petroleum jelly, some water, and of course, plaster of paris. You can try attaching a nail or some string to your object to aid removal.Firstly, you’ll need to coat your chosen object with petroleum jelly. This protects the object from getting stuck in the plaster, and allows you to easily lift it out of the cast. Once this has been done, set the object aside within easy reaching distance.
Next you’ll need to mix up the plaster of paris according to the manufacturer’s instructions. Be aware that plaster of paris tends to set quite quickly, so you need to be swift.
Once you’ve made up the plaster mixture, tip the appropriate amount into the shallow dish. Leave it a minute or so to settle, then firmly press your object into the mixture and leave until the plaster of paris has completely set. You can then remove your object, which should reveal a plaster cast of your ‘fossil’. To make it look a little more authentic, why not try painting the plaster and clipping the surrounding plaster into a round shape? You could also try coating the plaster in PVA glue and dipping into soil or sand for that just-dug-out-of-the-ground look!

Re: Make Your Own Deodorant
Kak esehiko sminor k112 makingyourown.co.uk
Re: Make Your Own Cat Litter
Why on earth is cat litter under Food Projects?? Also why is a British site giving recipes in cups?? I'm so confused.
Re: Make Your Own Cosmetics
I’m interested in starting my own makeup like but unsure how to go about it please can you help
Re: Make Your Own Cosmetics
I’m interested in having my own makeup line and I’m not sure how to start and go about it. Can you please assist me? Thank you
Re: Make Your Own Cosmetics
Hi I just wanted to get some infomation on how to start my own beauty brand and how much would it cost to make my own beauty line thank you
Re: Make Your Own Sloe Gin
I'm a newbie with sloe gin....made some fortnight ago and upon shaking just now I seem to have white bits floating around...is this…
Re: Make Your Own Tea
Hi I’m wanting to blend my own tea pack and label it in small amounts Can you do this
Re: Make Your Own Washing Powder & Fabric Conditioner
I have been making my own washing powder for about four years now and I use DriPak products, but…
Re: Make Your Own Washing Powder & Fabric Conditioner
Estelle - Your Question:What are the ingredients for making Washing powderOur Response:The detai
Re: Make Your Own Washing Powder & Fabric Conditioner
What are the ingredients for making Washing powder