Make Your Own Solar Panel

As more attention turns to the world’s dwindling oil supplies, and energy prices increase to rise, many people may be thinking of alternative ways to harness the energy to run their home or business.
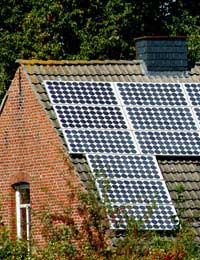
Energy from sustainable sources is cited as one of the ways forward – converting the energy from natural sources such as the sun, the sea and the wind into a domestic electricity supply. Although there are grants available, the realistic price of installing an alternative energy supply and generator in your home in particular can still cost quite a sum. And it can be quite a few years before the new alternative supply has paid for itself.
However, if you are interested in at least starting to source some of your energy supply from a natural source, then there is one option. You could try building your own solar panel, which will reduce the initial cost of installation and give you the capacity for expanding your solar panel heating system. This article gives an insight into how to make your own solar panel.
Make Your Own Simple Solar Panel
The solar panel we will be making here is intended to heat water, rather than produce electricity. The process is far simpler, costs less and yet it is still a highly effective and usable solution. The aim of this project is to harness as much of the suns radiated energy as possible. The heat from the sun will effectively be locked in a container, where it will be used to heat water that passes through it in a tube.Building Your Solar Panel Container
The critical element to consider when putting the housing container together is that it must let the sun’s rays in, but reduce the amount of heat energy that comes out. The more thermally efficient your container is at locking in heat, the faster your water will heat up, and to higher potential temperatures.
Choosing the size of your container is dependent on two things: the volume of water you want to heat, and the materials available to you. It goes without saying that larger solar panels will heat larger volumes of water to a specific temperature, faster. Whatever size you decide upon, the key construction elements will remain the same.
The front face of your solar panel container should be thick glass. Similar to a greenhouse, this will let the sun’s energy in, and stop the heat from escaping too rapidly. You could also use thick Perspex, which, whilst harder to maintain over the long term, is easier to fix tightly in place by drilling holes and screwing down. Glass will require some kind of framing to hold it in position.
The edges, or frame, of the solar panel container are easily made from wood 2x4 inch wood. You will need to drill holes at the top and bottom edge of the container frame for the entry and exit of the water pipe. These holes should obviously create a tight fit around the pipe, so as to minimise heat escape to the surrounding air by convection. For the back of the container, use a sheet of 1cm thick plywood board, and fix it to the back of container frame.
To aid heat retention, and also bounce the suns energy back into the container you will need to line the inside of the container with a material that provides insulation and reflection. You could use tin foil for this, but a much better option is reflective radiator insulation backing.
Installing Solar Panel Heater Pipes
Now you need to use a pipe to carry the water through the container heat trap. Don’t use insulated pipe for this job, as the water will not heat up efficiently - copper piping is the best option. In particular copper piping with a small bore, such as 10mm. This will need to be bent, using a pipe bender, into a pattern that snakes back and forth to cover the width of your solar panel container.Try to fit in as many bends as possible. The greater the surface area of the copper piping in the container, the more chance the sun has to heat the water contained within. The pipe should enter and exit the container via the holes you drilled earlier, and can be fixed in place with pipe retaining clips attached to the plywood backing-board.
After the top panel of glass or Perspex has been fixed in place, the solar panel system is ready to be filled with water. An external water drum should be used with exit points at the top and bottom respectively. The exit point should be attached to the entry pipe at the bottom of the solar panel, and the entry port, at the top of the water drum, should be attached to the exit pipe at the top of the solar panel. After the system is filled with water, when heated, it should flow in a circular cycle slowly bringing the water drum up to temperature. A third exit point on the water drum allows the hot water to be utilised.
The scale and size of this system can be adjusted accordingly to suit the user’s intended purpose. If a thermometer is not used, great caution should be taken as it’s possible for the water to heat up to dangerous temperatures that could easily cause severe skin burns.
- Make Your Own Electricity
- Ten 'Make Your Own' Uses for Lemons
- Make Your Own Humane Mouse Repellent
- Make Your Own Brass and Copper Cleaner
- How to Make A Garden Wildlife Pond
- Make Your Own Fruit Cage
- Make Your Own Furniture Polish
- Make Your Own Bird Feeders
- Make Your Own Water Butt
- Make Your Own Wildlife Habitats
- Make Your Own Natural Home Cleaning Products
- Make Your Own Plastic Bottle Greenhouse
- Make Your Own Birdhouse

Re: Make Your Own Cat Litter
Why on earth is cat litter under Food Projects?? Also why is a British site giving recipes in cups?? I'm so confused.
Re: Make Your Own Cosmetics
I’m interested in starting my own makeup like but unsure how to go about it please can you help
Re: Make Your Own Cosmetics
I’m interested in having my own makeup line and I’m not sure how to start and go about it. Can you please assist me? Thank you
Re: Make Your Own Cosmetics
Hi I just wanted to get some infomation on how to start my own beauty brand and how much would it cost to make my own beauty line thank you
Re: Make Your Own Sloe Gin
I'm a newbie with sloe gin....made some fortnight ago and upon shaking just now I seem to have white bits floating around...is this…
Re: Make Your Own Tea
Hi I’m wanting to blend my own tea pack and label it in small amounts Can you do this
Re: Make Your Own Washing Powder & Fabric Conditioner
I have been making my own washing powder for about four years now and I use DriPak products, but…
Re: Make Your Own Washing Powder & Fabric Conditioner
Estelle - Your Question:What are the ingredients for making Washing powderOur Response:The detai
Re: Make Your Own Washing Powder & Fabric Conditioner
What are the ingredients for making Washing powder
Re: How to Make a Green Roof for Your Shed
I want to cover a large log cabin using a sedum blanket. Is it possible to buy the basic blanket for planting up…