Make Your Own Birdhouse

Decades and intensive farming and expanding urban sprawls have wreaked havoc on the natural nesting sites of many of Britain's native and visiting birds. Whilst there have been moves to encourage more organic and wildlife-friendly ways of living alongside our flora and fauna, sometimes a small helping hand can make all the difference.
A birdhouse is a fantastic way to encourage wildlife into your garden. In order for bird populations to be maintained, they not only need access to food and water, but also suitable nesting sites in order to breed successfully.
Different birds have different nesting preferences - for instance some birds may prefer to nest in long grass or thickets of undergrowth. Before You Make Your Birdhouse
It is worth investigating which birds are regular visitors to your garden. This will help you to determine what size birdhouse you wish to build, and how big the entry hole will be as some species of bird - as well as squirrels - will rob a nest and can kill the chicks.
- 25mm (1inch) is large enough for coal tits, marsh tits and blue tits only
- 28mm is big enough to allow great tits
- 32mm will allow sparrows, nuthatches and finches access to the birdhouse
You'll also need to choose a suitable site for your birdhouse. It needs to be ideally 2 to 3 metres above ground level at the very least. The birdhouse should be sited away from ledges or bushes where predators like cats can gain access to them. You should also consider where the prevailing winds and rain come from, and site your homemade birdhouse in a sheltered spot. The site should be quiet, away from feeders with a clear flight path.
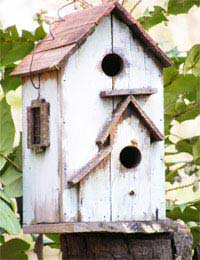
Angling the birdhouse slightly so that the rain will run off away from the entrance may help. The birdhouse design described in this article has an overhanging roof, which will aid water drainage. Also make sure that the birdhouse won't be baked in any sunshine. Ideally a north to south easterly facing direction will avoid any weather-related problems.
Finally, try to get your birdhouse up before breeding season starts - this can be from February into early summer.
Why Make Your Own Birdhouse ?
A simple design is always best. Birds want function over aesthetically pleasing houses, and will only make use of a house that meets their needs. Your homemade birdhouse or nestbox needs a few fundamental features - an entry/exit hole or space, a small drainage hole in the bottom for any water that finds its way in and a tightly fitting lid. This means that cost of your homemade birdhouse will be minimal.The birdhouse should be waterproof, but try to avoid being overzealous with any wood preserver or treatments, as the smell can be overpowering and deter birds. You should also only use water-based preservatives and preserve the outside of the birdhouse and away from the entrance hole.
It's worth bearing in mind that perches that are commonly found on commercial birdhouses are also not necessary under the entrance/exit hole. They will only serve to encourage predators.
Building Your Birdhouse
The birdhouse (or nest box) is really quite easy to make. The materials you'll need are:Wood or Timber Off Cuts: 12-15mm ply is an ideal material for a birdhouse. You will need one length 15cm in width and 150cm long.
Sealant: A silicone-based aquarium sealant is best, and you must make sure that the brand you choose does NOT contain any fungicides.
Galvanised Nails or Brass Screws
You will also need the following equipment:
- Drill with 10mm wood drill, 25mm, 28mm or 32mm drill bit
- Pencil
- Tri-Square (any wonky cuts can cause drafts in the birdhouse)
- Measuring Tape
- Saw
Method:
The whole birdhouse can be made from one length of wood.
The first part of the wood length will be cut up to form the birdhouse sides and roof. The wood should be divided up as follows:Birdhouse Sides: From the bottom, measure and mark 20cm on left hand side and 25cm on the right hand side. Then from your 20cm mark, measure a further 25cm on the left, and on the right, measure 20cm from your original 25cm mark. This will create two sidepieces with a diagonal sloping roof. Then mark up the front section of the birdhouse - this should be 20cm in length.
The next part of the wood will form the roof, base and back of the wood and should be cut up as follows:Measure a further 21.2cm and mark off. This will become your roof. Another 11.2cm measurement will form the base section of your birdhouse. The remaining 45cm will then form the back of the birdhouse.
Before you cut all the sections out from the wood, be sure to put in your entrance/exit hole. The drill bit you use will depend on which birds you intend to use the nestbox (see 'Before You Make Your Birdhouse'). Make sure that the hole is at least 12.5cm from the base of the birdhouse, as this will help to keep the chicks safe. The cut that forms the front panel should also be roughed up on the inside to assist young birds to climb out. Using the 10mm drill bit, you should drill in a couple of holes in the 'base' section to help with water drainage.
Once you have cut out the sections, you can then screw all the parts together and seal. Make sure to leave at least 4 or 5cm at the top of the birdhouse on the back so that it can be screwed into place. The lid should be hinged with a thick strip of rubber on the outside and kept closed with a catch. Do not be tempted to look in on the nestbox until you are absolutely sure that the birds have vacated, as you might cause them to abandon their young.
Reader's Tip
Here is an additional suggestion from one of our readers:Clean out the house after the nesting season is over, by raking out soiled nest material. Scald out any mites, lice etc., which might have infested the nest, by pouring in hot water. Do not use anything other than hot water. It is also useful to cover the hole outline with a hard material such as aluminium to prevent predators gnawing or pecking their way into the nest box. This can be done by drilling a piece of aluminium (or hard plastic) sheet with a hole cutter of the same diameter as the wooden hole. The outside of the metal will need to be only of sufficient size for it to be screwed onto the face of the house to surround the wooden hole. Use only short, small diameter screws so that they do not penetrate through the wood.
- Make Your Own Electricity
- Ten 'Make Your Own' Uses for Lemons
- Make Your Own Humane Mouse Repellent
- Make Your Own Brass and Copper Cleaner
- How to Make A Garden Wildlife Pond
- Make Your Own Fruit Cage
- Make Your Own Furniture Polish
- Make Your Own Bird Feeders
- Make Your Own Water Butt
- Make Your Own Wildlife Habitats
- Make Your Own Natural Home Cleaning Products
- Make Your Own Plastic Bottle Greenhouse
- Make Your Own Solar Panel

Re: Make Your Own Cat Litter
Why on earth is cat litter under Food Projects?? Also why is a British site giving recipes in cups?? I'm so confused.
Re: Make Your Own Cosmetics
I’m interested in starting my own makeup like but unsure how to go about it please can you help
Re: Make Your Own Cosmetics
I’m interested in having my own makeup line and I’m not sure how to start and go about it. Can you please assist me? Thank you
Re: Make Your Own Cosmetics
Hi I just wanted to get some infomation on how to start my own beauty brand and how much would it cost to make my own beauty line thank you
Re: Make Your Own Sloe Gin
I'm a newbie with sloe gin....made some fortnight ago and upon shaking just now I seem to have white bits floating around...is this…
Re: Make Your Own Tea
Hi I’m wanting to blend my own tea pack and label it in small amounts Can you do this
Re: Make Your Own Washing Powder & Fabric Conditioner
I have been making my own washing powder for about four years now and I use DriPak products, but…
Re: Make Your Own Washing Powder & Fabric Conditioner
Estelle - Your Question:What are the ingredients for making Washing powderOur Response:The detai
Re: Make Your Own Washing Powder & Fabric Conditioner
What are the ingredients for making Washing powder
Re: How to Make a Green Roof for Your Shed
I want to cover a large log cabin using a sedum blanket. Is it possible to buy the basic blanket for planting up…