Make Your Own Recycled Wooden Planter

If you’ve bought your own wood to make do a spot of DIY or a construction project, inevitably you’re going to be left with odds and ends of timber. As luck usually has it, they’re either seemingly too short to be of any use or slightly too long to warrant taking to the tip.
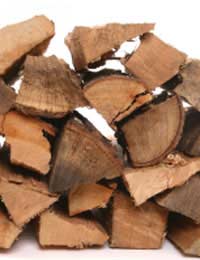
But there’s one creative and easy way you can put your timber offcuts to good use – by making your own recycled wooden planter. Ideally, for this project you’ll also need offcuts of timber logs, which can be easily and very cheaply obtained from timber yards. Ask around – there also may be plenty of people having trees pruned and cut who will be more than happy for you to take away the logs for them.
What You’ll Need
Before you start constructing your recycled wooden planter, here is a list of equipment that you’ll need:- A hammer
- A saw
- Galvanised Nails
- G-clamp
- Workbench or table.
You’ll also need to decide on how large you want your planter to be. Once you’ve decided, you’ll the following cuts of wood to work with:
For the base:
- 3 x 2” or 75 x 50mm – three widths
- 2 x 1” or 50 x 25mm – two lengths
For each side (four sides in total):
- 2 x 1” or 50 x 25mm – three widths
For the top frame:
- 3 x 2” or 75 x 50mm – four lengths same width as base
For the ‘cladding’ on each side of the planter, you can either use logs of rough timber cut through the centre lengthways, or additional lengths of rough sawn timber.
How to Make Your Recycled Wooden Planter
Firstly you’ll need to make sure that you’re working with consistently sized widths and lengths. To make your planter base, cut three widths of 3 x 2, making sure that your base is square. You’ll then need to measure and saw two lengths of 2 x 1 and nail them to the base, making sure to position them on the base where you’ll eventually connect the four sides that make up the planter.Your next job is to cut four pieces of 3 x 2 section to make a frame the same measurements as the base. This frame is firmly secured on top of the planter and forms the base of each side of the planter.
Constructing the Sides of Your Recycled Wooden Planter
You’ll then need to take a piece of 2 x 1 and make pilot holes widthways through both ends of the wood. Using galvanised nails, fix the frame together to create a ‘U’ shaped frame. This then should be attached to the base. You should now have one rectangular side of your planter constructed. Repeat this step to construct the opposite side of your recycled wooden planter.Cladding Your Frame
Now that you have a base and frame attached, the next job is to cut the cladding for your recycled wooden planter. You need to make sure that the rough timber or sawn logs don’t overlap, otherwise you’ll have problems fitting all of the cladding neatly in place. As a rough guide, each piece of cladding will need to be around 12 inches long.Next, you’ll need to stand the planter sideways on a workbench, clamping firmly in place. Measure your rough-edged timber or sawn timber logs to size, and securely nail the rough wood in place at the base end and frame end.
… And Finally…
The final job is to select pieces of cladding that will fit around the frame to clad the remaining three sides. This may require some trimming and cutting to get them to fit exactly in place, but once the job is done you can line your planter with plastic (making sure to punch in holes to allow for drainage), line the bottom with crocks or gravel, fill with compost, and then plant up.Over time your recycled wooden planter will weather, creating a stunning and complementary natural-looking feature for your garden or patio area.
- How to Make Your Own Car Windscreen Cleaner
- A Kitchen Herb Garden for all Garden Sizes
- Make Your Own Medicinal Herb and Flower Garden
- How to Make a Green Roof for Your Shed
- Make Your Own Organic Fertiliser
- Make Your Own Barbeque
- Make Your Own Compost Heap
- Make Your Own Planters and Pots
- Make Your Own Insect Repellents
- Make Your Own Organic Compost
- Make Your Own Cloche & Mini Greenhouse
- Make Your Own Potato Planter
- Make Your Own Salad Box

Re: Make Your Own Deodorant
Kak esehiko sminor k112 makingyourown.co.uk
Re: Make Your Own Cat Litter
Why on earth is cat litter under Food Projects?? Also why is a British site giving recipes in cups?? I'm so confused.
Re: Make Your Own Cosmetics
I’m interested in starting my own makeup like but unsure how to go about it please can you help
Re: Make Your Own Cosmetics
I’m interested in having my own makeup line and I’m not sure how to start and go about it. Can you please assist me? Thank you
Re: Make Your Own Cosmetics
Hi I just wanted to get some infomation on how to start my own beauty brand and how much would it cost to make my own beauty line thank you
Re: Make Your Own Sloe Gin
I'm a newbie with sloe gin....made some fortnight ago and upon shaking just now I seem to have white bits floating around...is this…
Re: Make Your Own Tea
Hi I’m wanting to blend my own tea pack and label it in small amounts Can you do this
Re: Make Your Own Washing Powder & Fabric Conditioner
I have been making my own washing powder for about four years now and I use DriPak products, but…
Re: Make Your Own Washing Powder & Fabric Conditioner
Estelle - Your Question:What are the ingredients for making Washing powderOur Response:The detai
Re: Make Your Own Washing Powder & Fabric Conditioner
What are the ingredients for making Washing powder