Make Your Own Mosaic

By making your own mosaic, you'll be taking a lesson in art history. The art of mosaic has been around for centuries. The Romans were noted for their ornate floor mosaics, as were the Byzantines and early Christians. Mosaic art has since appeared throughout the ages and is still used in contemporary art pieces, as found in Barcelona and modern day Islamic artwork.
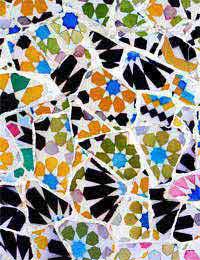
The word mosaic basically refers to the art of using small pieces of material - commonly ceramic or porcelain tiles, glass tiles, marble, shells, paper or mirror glass - that are amalgamated to make a larger unified pattern or picture. Mosaics can be created on very small scales for purely decorative purposes, or as vast whole surfaces. Amateur mosaic projects usually utilise the 'direct method' of mosaic assembly, whereby the mosaic tiles are fixed directly onto a prepared surface.
This article looks at different ways to make your own mosaic using recycled materials for use around the home and garden.
Mosaic Pot Project
Boring generic plant pots can be given a makeover with homemade mosaic art. You can make your own mosaic plant pots with ease - all you need is a few materials:- Strong PVA Glue
- Mosaic tiles - e.g. broken porcelain or glass tiles (about ¾ inch)
- Strong general adhesive e.g. 'No More Nails' or non-branded alternative
- Tile Grout
If you're doing your mosaic design on a terracotta pot, you'll need to first PVA the pot and leave to dry. Terracotta is slightly porous, which means that moisture is easily absorbed in and out of the pot. Brushing on the PVA forms a barrier that stops the tile grout and mosaic coming into contact with that moisture. Other pots may require a textured surface for the mosaic pieces to bond to, so a thin layer of mastic can be applied.
If you're struggling to find enough mosaic pieces, you can always collect together old unwanted crockery and wrap it in a towel. Then take a hammer to it and have a bit of fun smashing the crockery into pieces roughly around ¾ inch!
You can then set about starting your mosaic, by fixing each piece of mosaic tile to the pot with the general adhesive. Once all the pieces have been stuck on, you'll probably have to leave the adhesive to set overnight. You will then be able to grout inbetween the pieces with tile grout, available from any DIY store.
Bear in mind that if you're creating pots for use outside, you'll need to replace the solvent-based general adhesive with a thinset bonding mortar.
Mosaic Table
You can also use a similar method for creating a flat mosaic tabletop surface for outside use.If you have an old outside table that you want to spruce up, there is no better way than creating your own mosaic table. The type of preparation you undertake will depend on the table surface material - wood can be prepared by roughing up with a coarse sandpaper, whereas glass will need a thin layer of mastic that is texturised.
Once your working surface is ready, you can start work on your mosaic. You'll need to start in the middle of your table, working outwards towards the edges. If the table is for outdoor use, you'll need to stick the mosaic tiles down with a thinset bonding mortar. However if the table is going to be covered you can use a normal general adhesive. You don't need more than a small dab of bond as any excess will leach out from under the tiles and create a mess.
Once you've set all your mosaic pieces in place, leave the table surface to dry overnight or for at least eight hours. After this time you can then grout the surface, taking care to make sure that there are no holes where water can get in. You should make sure that any sharp edges are removed with a metal grinder or sanding. Once the grout has dried, your table is ready for use!
Mosaic Mirror and Photo Frame
The methods described above can easily be applied to many indoor projects, such as a mosaic mirror. However you shouldn't be limited to using just broken crockery for your mosaic pieces. Mosaics can be made using any material available, so why not experiment? For instance, a mosaic mirror frame for the bathroom can be created with small pieces of shell for a coastal and nautical feel.You could also try using old photographs for a mosaic photo frame. If you have a collection of unwanted, slightly blurry or obscured pictures that would otherwise be useless, why not cut them into small tiles and use them in a more artistic manner?
Many materials can be recycled for mosaic art - you could go a little more abstract and try using materials such as bottle tops or milk tops to create mosaic mobiles. Basically, any material that is fairly shallow in depth can be used in your mosaic art. It's a great project for kids as it allows them to explore both their creative talents, as well as showing them how fun recycling can be.
With outside garden projects you could expand on the activities described in this article. Why not try creating your own mosaic pathways or murals. Of course this depends on the materials available to you, how much time you can spare and your artistic ability! But you might be pleasantly surprised by the results.