Make Your Own Embroidery Patterns

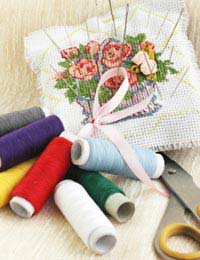
Embroidery is a relaxing hobby. It’s also a great way to decorate a wide range of fabrics, such as clothing, bags, pillow cases, table cloths, napkins and more. However, shop-bought designs can be limiting, especially if you want to embroider something a bit more modern than ducks or floral arrangements!
So, why not make your own designs?
Keep it Simple
At the simplest level, you can draw or trace embroidery designs on to light-coloured fabric using a special fabric pen which washes or wears off. All you need to do then is follow the lines while you’re embroidering.Iron on Designs
Iron on designs are the most versatile embroidery option. You’ll need:- A computer with an image resizing programme (desirable, not essential)
- A printer
- Tracing paper
- An iron on transfer pencil or pen
- Fabric
- Embroidery thread
Look around for an image you’d like to embroider. This might be a drawing of your own, something from a book or something you see online. Remember, if you have any intention of selling an embroidered item or pattern, you cannot just steal someone else’s image.
One tip for when you’re starting out is that pictures from colouring books are a good option to begin with as they are already reduced to a clear outline. Once you have found the picture, save it on your computer or scan it in and save it. Then size it to the size that you need for the fabric you’re using.
Next you need to print your design out and then trace it onto tracing paper. At this stage you can alter any bits of the image that you don’t like. For example, if a certain area of the design looks complicated to stitch, you can simplify it.
Try to pare the design down to an outline which is easy to stitch. You can add detail when you are embroidering by referring to your original design and using shading with thread and different textured stitches.
Next Steps
Next, take your traced design and turn it over. Trace over the lines on the back using your transfer pen or pencil. Make sure you put some paper or other protective surface underneath the tracing paper as the transfer may go through.Remember that although the transfer pencil design has been reversed, this will mean it will be the right way around when you iron it on. Bear this in mind when you’re using letters and numbers as it can get confusing!
Iron On
Next take your clean, ironed fabric and decide where you would like it to go. Place your tracing paper with the transfer pen/pencil side down on the fabric. Your transfer pen or pencil should come with instructions on ironing it on. Usually you will place some thin fabric between your iron and the tracing paper, then press down hard as you iron.Now all you need to do is sit down and enjoy embroidering your very own design.