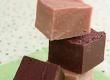
Make Your Own Cheese

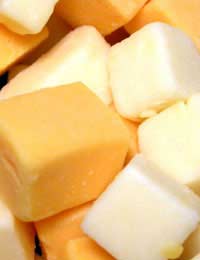
There's a cheese out there for almost everyone - hard, soft, tangy and mature, mellow and creamy or breathtakingly ripe. Even people with lactose intolerance can enjoy the delights of goat's cheese, sheep's milk cheese and buffalo cheese, each with their own distinctive taste and texture.
Cheese is also the backbone of many a dish or light meal - yet despite it's high calcium content, it often gets a bad press due to its fat content. But as with most things in life, moderation is the key. And eating a good quality cheese will ensure that you only need a reasonable sized portion to feel satisfied!
Making Cheese At HomeMaking your own cheese at home ensures that you have control over the ingredients that go into your cheese. For instance, you won't have to revert to using extras like additives and preservatives used in commercial cheese. Not to mention the 'unmentioned' and unlisted hormones, pesticides and antibiotics that can make their way into our food. You can also opt for organic ingredients - in terms of milk this means that calves are allowed to stay longer with their mothers and are allowed to stay in sociable groups, and the routine use of antibiotics and feed stimulants is not undertaken.
Making cheese at home also ensures that you can exercise some degree of quality control over your finished product too! And not forgetting the sense of satisfaction gained from mastering a recipe and technique before enjoying the fruits of your labour. Of course, despite following a recipe in reality it may take a few tries to get your homemade cheese perfect. But ultimately you will learn through some element of trial and error and the rewards will far outweigh the hard work.
Once you have mastered this simple cheese recipe, you can swop the crème fraiche and yoghurt 'starter' (relating the bacteria) for specialised starter bacteria specifically for cheeses. There are many starters available and each will bring a different taste, texture and quality to the cheese.
Before You StartBefore you begin, it's vital that you have the right equipment to hand. A thermometer is especially useful as the milk needs to ideally be kept at 28C (82.4F). You'll also need to source some muslin or cheesecloth and make sure that (as with the knives, mixing bowls and the stock pot/large pan that you use) it should be sterilised shortly before you being making the cheese.
Make Your Own Cheese
This recipe makes a mild, soft cheese that can be eaten as is. The curds can also be collected and used to make a cottage style cheese. The cheese can also be put through a cheese press to remove the whey and make a harder, more crumbly cheese.Equipment:
- Sterilised muslin clothes or cheesecloth
- Sterilised mixing bowl
- Sterilised palette knife or curd knife
- Sterile Stock Pot/Large Pan
- Colander
Ingredients
- 4.5 litres (1 gallon) Organic Milk
- Crème Fraiche or Plain Yoghurt
- Rennet
- Salt
Method
Depending on your preference, place either the yoghurt or crème fraiche into the large pan or stock pot and leave for half an hour. This allows the milk to develop a richer flavour, whilst encouraging it to acidify.
Place the pan onto the hob and gently bring the milk up to 28C/82.4F and maintain this temperature - this is where having a thermometer really helps!
You will then need to add the rennet to the milk. Take around 4 drops of rennet and disperse and dissolve it in a small cup of pre-boiled water before mixing in with the milk. Once you have thoroughly mixed the two ingredients, remove the milk from the heat and leave to cool for another half an hour. During this time the top of the milk should start to congeal and set and the curds will separate.
At this point you can line your colander with a piece of sterilised cheesecloth or muslin. You can then collect the curds by cutting them into small cubes and place them into the muslin. Then bring the corners of the cheesecloth together to form a 'pouch' in which the curds can drain for around 8 hours, or overnight.
Once the cheese has drained, you can open the cheesecloth and add in salt to taste - this can be up to or over one teaspoon.
Make sure to store your cheese in the fridge. Because this simple cheese contains whey, it will go off quicker than harder cheeses.